

840
 Before you can start with your “Mission Restoration”, make sure you follow these tips step-by-step. With generic tools and restoration items, it is easy to refurbish furniture with a personalized touch and feeling towards it. With that being said, you are good to go with a mission to furniture restoration DIY guide.
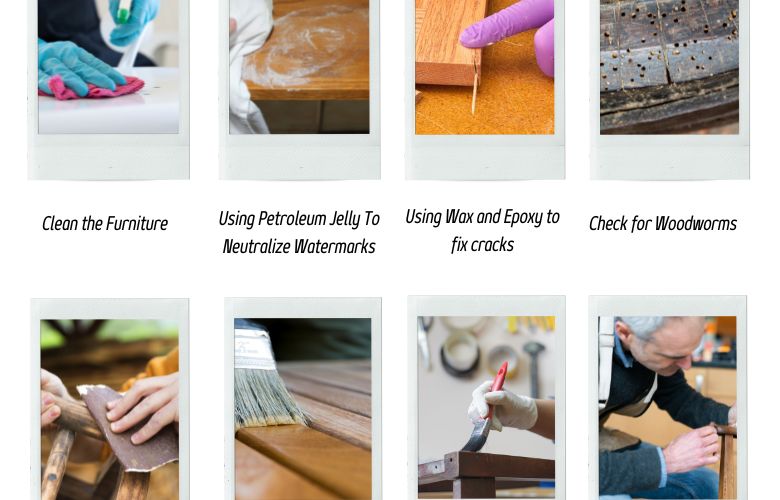
Table of Contents
Decoding The Basic Factors
Before you can start with your “Mission Restoration”, make sure you follow these tips step-by-step. With generic tools and restoration items, it is easy to refurbish furniture with a personalized touch and feeling towards it. With that being said, you are good to go with a mission to furniture restoration DIY guide.
-
Do a bit of homework research:
- Furniture and different types of wood require different tools and ways of approaching. This extends to any antique furniture repairs. Check the tools properly and this would affirm better results.
-
Check the type of Wood:
Keep in mind while dealing with different types of wood. With sensitivity and finish being important factors, here are some types of wood with distinct colour and finish,- Mahogany: This comes with a reddish to pink tinge and backs with straight-grained
- Oak: Comes in a fairly pale beige finish
- Walnut: Heavy and dark coloured with stiff grain
- Maple: Comes with spots of red and brown mixed with the finish being in a light colour
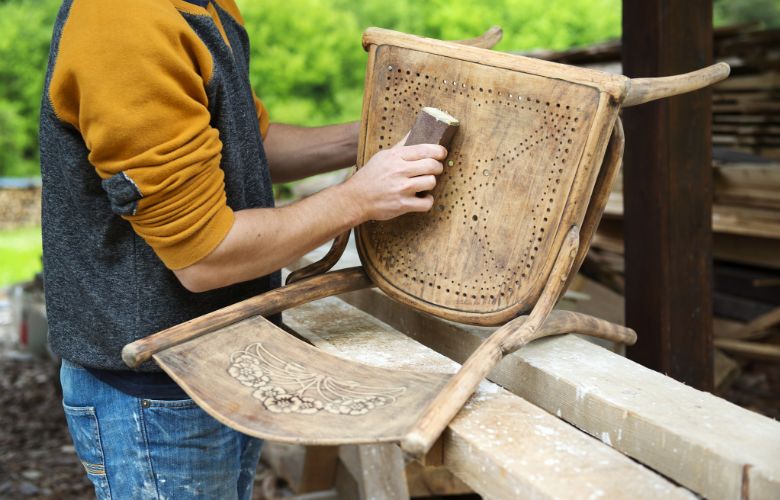
Here is how you restore Antique Furniture:
-
Clean the Furniture:
Restore furniture DIY requires you to clean your antique furniture upfront. Wash the surface using wood-cleaning soap solutions or oil soaps. Check with the instructions mentioned and mix it with water to form the solution. Take a clean dry cloth and dip it in the solution and gently wipe across the table surface. Make sure to filter excess water back to the bowl and use the wet cloth only. Although there are many other alternatives available in the market, using a wood-cleaning soap is the safest bet. More because other chemicals can wear out the furniture and destroy the surface within a couple of minutes. Once the surface is wiped with the soap liquid, use a different dry cloth to wipe and dry it off. -
Using Petroleum Jelly To Neutralize Watermarks And Ring Marks:
Using petroleum jelly works wonders in removing stains and marks that are caused over time of usage. Take a dry cloth and put some jelly over the table surface and completely wipe the same. Allow a good time to soak and this would eventually work to remove all those watermarks. However, in some cases, Petroleum jelly might not work as efficiently as you might think. Check out some products online that are exclusively available for removing stain marks and ring marks from wooden surfaces. -
Using Wax and Epoxy to fix cracks of Different Sizes:
While both these products essentially do the same work, the effectiveness depends on the size of cracks and holes developed. What this means is when you deal with cracks and the overall finish is concerned, both these chemicals have distinct propositions. That being said, this is a crucial DIY wood table restoration that needs you to follow carefully about these aspects,- If the crack is smaller or minor, Furniture Wax does more than justified work
- If the crack is larger, there is no better alternative than Epoxy
- While using Epoxy putty, make sure to follow the rules carefully and mix it appropriately.
- In some cases, the colour of Epoxy putty might not match exactly the wood colour. In this case, using a wipe-on stain would make sure to hide the repair marks better
-
Check for Woodworms:
Woodworms are extremely common to spot in antique furniture. The holes don’t add up to anything special and in turn, take away the beauty of the product. In hindsight, checking worms on all wooden furniture is a must, since these have the tendency to destroy the quality and weaken the wood to a large extent. If the entire furniture is infested with woodworms, we recommend seeking professional help before it is too late. Else, if the problem is minor and solvable, we recommend using commercial termite chemicals. The usage depends on one chemical to the other. On a generic observation, one needs to paint across the holes or sometimes push the liquids inside the hole to prevent further infections. We also recommend re-applying the liquid after a few days of initial application. This is a safety measure and removing the last bit of wood worms and termites would be completed. Allow the liquid ample time to dry off completely. Once the surface is dry, apply some wood wax to these holes and fill up the space to make it look and feel sturdy.
-
Removing Paint Marks:
In all probabilities, your antique furniture may have received a splash of paint accidentally over the years. The restoration varies from different types of paints and the condition of the furniture. Depending on these, there are different treatments available. For instance,- For Distempers or Emulsions: If the table is affected by a splash of any of these strong paints, the first thing we recommend is to clean with the help of a clean rag and methylated spirit. We recommend putting the rag over the paint mark and allowing it to soak on the main marks. Over time, use your nails or a small piece of wood to remove the stain. Alternatively, if the penetration is bigger and disrupts the polish, we recommend using cotton wool mixed with white spirit. Use these over the stain and the subsequent spots. The white spirit dissolves the polish layer and dries up. Use furniture-based oil to restore the polish and allow the surface to reform its relevance.
- For Dry Paints: Simply use water-based paints and gently wipe off the surface using a dry cloth. This is the simplest way to restore dry paints
-
Removing Oil and Grease Marks:
Much like the paints in the previous point, the easiest DIY furniture stain remover for removing oil and grease marks is by applying clear wax. Yes, using a bit of clear wax over the affected portion would soak up the stain imminently. However, this works better if the stain is fresh. Once the wax is dry, use a clean cloth to remove the fresh mark and see if the stains are gone for good. On the contrary, for complete removal of stain, the first thing you need is to remove the previous finish off the surface using paint or a polish stripper at your fingertips. For cleansing, the polish strippers use methylated spirit and mix it with talcum powder. These form a strong paste and apply this over the polish strippers. Once applied, this removes the oil stain and all you need is to re-polish and sand the surface. Be sure to do this step carefully as even a small mistake would cost permanent damage to the table surface.
-
Apply gel stain to restore missing colour:
One of the major steps while performing DIY wood table restoration, lies in the restoration of the missing colour of the surface. The simplest way is to use a soft cloth mixed with a gel stain and gently wipe across the furniture. Wipe any excess stain using a clean cloth and allow the surface to dry. This might take more time than you expect. That being said, there is no requirement to strip off the previous finish while restoring the colour of the furniture using a gel stain. The gel stain takes ample time to work and doesn’t dry fast. If you feel the colour is not matching your choice, remove them using mineral spirits and by applying a different colour.
-
Control the areas of Bleached Wood:
You often observe the portion of your furniture bleached as a result of its position with direct contact with sunlight. In this step of DIY furniture makeovers, try rubbing the surface using teak oil and use a ball of cotton wool to gently spread across the affected area. Continuing the process yields better results and we recommend trying this step a couple of times. Alternatively, try using liquid wax more often as this ensures there are no complex reactions or even discolourations. Even more, since wax can easily penetrate the wood and gets absorbed naturally.
-
Using Wiping Varnish:
In this crucial step of the furniture restoration DIY guide, we recommend the usage of Wiping Varnish backed with mineral spirits to restore shine. Additionally, this also backs up in providing a protective finish layer for a long time. Gently apply this liquid spirit over the antique furniture and wipe using a dry and clean cloth in a circular direction. Once done, make sure to remove the excess liquid with respect to the grain of the wood. This can be done using a dry cloth. Keep it overnight and allow the process of restoration to commence accordingly. What’s even better is this works on all types of wood and provides a good finish in the end. -
Use Varnish over the Wood Furniture for changing colour:
If you are tired of looking at the same colour of wood for generations, it is a good idea to restore and re-paint the same. The easiest DIY furniture restoration would be by applying a coat of varnish using a paintbrush. Make sure to apply the same along with the grain of the wood. This is important as it soaks and ends up giving a lovely finish to the product. Allow the varnish to dry off initially and once done, apply a bit of sand and finely grit using sandpaper. Once this is over, we recommend applying a second coat of varnish and allowing the furniture to soak in once again. Depending on how darker finishes you expect, for instance, if you intend for a darker finish, apply the third coating of wood varnish. Else, you can even contain yourselves with the first step itself.
-
Polishing using Linseed Oil:
Polishing with Linseed Oil is tricky. Among the most popular DIY wood table restoration, using Linseed Oil must be done with absolute care. The right way is by rubbing boiled linseed oil over the wood and then using a clean lint-free cloth to remove it. Do it a bit vigorously till the surface becomes hard and does not soak any more linseed oil. Use a different dry cloth following this step to remove any excess oil from the surface and allow the furniture to dry overnight. It is a good practice to do the procedure for 7 straight days and allow it to dry at night. Over time, the complete polish and finish would shine, giving it a perfect look of restoration.
